For years, I’ve been thinking about starting a series where I explain everything I self-host, with snippets and up-to-date instructions, batteries included. This is the first part of “The Definitive Selfhosting Guide”, and I wanted to tackle the hardest topic first: email.
Running email has been, by far, the most challenging part for me over the years. There are many production-grade setups ready to go, like mailcow-dockerized or docker-mailserver, and for a good reason: Mail servers are notoriously complex and have many moving parts. It’s easy to miss mail on your own server, but even easier to send messages that never end up getting delivered anywhere. But it’s not impossible. And if we want to save the Internet we’ve come to love, I think it’s imperative not to leave the playground to a handful of big providers that don’t want individuals to participate. For that reason, amongst others, I run mail servers for my business, a charity I work for, and for myself - no third parties involved. Mail servers also have become my pet peeve, so much so that I talked about it at easterhegg23.
If there is any part of this series that you likely want to skip, it’s probably this, because it’s relatively involved. You have been warned.
A Bit of Theory
Let’s start with a bit of theory to figure out how mail is both sent and received, so that we know what to build. Here’s the flow (not exhaustive, only for our intents and purposes):
- Person A writes an email in their mail client (MUA = Mail User Agent) and clicks “Send”
- Thunderbird, Outlook, Apple Mail, a webmail interface
- The mail client connects to their mail server (MTA = Mail Transfer Agent) via SMTP Submission
- SMTP = Simple Mail Transfer Protocol
- Port 587 (starts unencrypted, upgraded with STARTTLS) or port 465 (encrypted from the first byte, “implicit TLS”)
- STARTTLS = a command that upgrades an existing plaintext connection to an encrypted TLS one
- The sender MTA checks authentication and the message, then queues it for delivery
- User credentials (username and password, or a token)
- Sending policies (rate limits, allowed sender addresses, size limits)
- Outbound rate limiting also protects the sender’s reputation: a compromised account that sends spam can get the whole server’s IP blocklisted
- The sender MTA signs the message with the DKIM private key
- DKIM = DomainKeys Identified Mail
- It adds a cryptographic signature header to the message. The matching public key is published in the sender domain’s DNS, so receivers can verify the message wasn’t altered and really came from that domain
- The sender MTA looks up the MX records for the recipient’s domain
- MX record = Mail eXchanger, the DNS entry that names the server(s) accepting mail for a domain (for user@example.org, it queries example.org)
- If no MX record exists, the sender falls back to the domain’s A/AAAA record (its IPv4/IPv6 address)
- The sender MTA checks whether the recipient domain requires secure transport (MTA-STS)
- MTA-STS = Mail Transfer Agent Strict Transport Security, a policy a domain publishes saying “only deliver to these mail servers, and only over verified TLS”
- The sender looks up the DNS TXT record
_mta-sts.<recipient-domain>and, if needed, fetches the policy over HTTPS fromhttps://mta-sts.<recipient-domain>/.well-known/mta-sts.txt
- The sender MTA connects to the recipient MTA on SMTP port 25, directly or via relays
- Port 25 is used for server-to-server mail transfer
- The connection is upgraded with STARTTLS
- If an MTA-STS policy exists, the sender enforces it: the MX hostname must match the policy, and the certificate must be valid. If not, it won’t deliver to that server and retries later instead of falling back to plaintext
- The recipient MTA checks the sender during the SMTP conversation
- Does the sending IP have a valid reverse DNS record (PTR record, the IP-to-hostname lookup) that resolves back to the same IP (forward-confirmed reverse DNS, FCrDNS), and does it match the name the sender MTA announces (HELO/EHLO)? Many servers reject mail from IPs without it, and from dynamic or residential IP ranges.
- Is the sender MTA authorized to send for the sender’s domain? (SPF = Sender Policy Framework, a DNS list of permitted sending servers. It checks the envelope sender, the technical return address used during the SMTP session, which can differ from the From address people see)
- After the message body has been received: does the DKIM signature match the public key in the sender domain’s DNS?
- Does the sender domain publish a policy for handling failures? (DMARC = Domain-based Message Authentication, Reporting and Conformance. It requires that SPF or DKIM passes and aligns with the visible From domain, and tells receivers whether to reject, quarantine or accept failures)
- Is the sender MTA’s IP address on a blocklist? (DNSBL = DNS-based Blocklist, also called RBL. The recipient
queries a list such as Spamhaus ZEN with the sender’s IP reversed, for example
4.3.2.1.zen.spamhaus.org. Any answer means “listed”.) - Is the sender’s domain on a domain blocklist? (DBL/URIBL = lists of domains known for spam. The recipient checks the From domain, the envelope domain, and domains found in links in the body.)
- The recipient MTA passes the mail to spam and policy tools, which combine all signals into a score
- Examples: rspamd, SpamAssassin, antivirus scanners
- They often hook into the SMTP session via the milter protocol (mail filter), so mail can be flagged or rejected before it is accepted
- They usually don’t make a yes/no decision per check. Each signal adds or subtracts points (SPF/DKIM/DMARC results, blocklist hits, content rules, attachment types), and the total decides: deliver, flag as spam (junk folder), or reject.
- Reputation signals: IP and domain reputation (age of the domain, sending history, volume spikes), and sometimes shared reputation services (Spamhaus, Barracuda, Cloudmark, Microsoft SmartScreen, Google’s internal reputation)
- Content checks: spam-like wording, suspicious links or URL shorteners, mismatch between link text and target, risky attachments
- Engagement signals at large providers: do recipients open, reply to, or mark this sender’s mail as spam? Complaint rates (via feedback loops, FBL) strongly influence future delivery.
- Greylisting (optional): the first delivery attempt from an unknown sender is temporarily refused (4xx). Legitimate servers retry, many spam tools don’t.
- Based on that verdict, the mail is accepted or rejected, then handed to the MDA
- MDA = Mail Delivery Agent, the component that puts mail into mailboxes
- Rejecting during the SMTP session (a 5xx reply) is preferred over accepting and bouncing later, since bounces can hit innocent forged senders
- The handover often uses LMTP (Local Mail Transfer Protocol, a variant of SMTP for final local delivery)
- The MDA stores the email in the recipient’s mailbox, using Sieve rules
- Sieve = a rule-based language for processing incoming mail (filing into folders, auto-replies, forwarding, discarding)
- Person B’s mail client connects to their mail server and fetches the message
- IMAP = Internet Message Access Protocol, which keeps mail on the server and syncs it across devices
- Port 993 (implicit TLS) or 143 (STARTTLS)
Now we can take inventory of what we need to be able to fulfill both the sender and the receiver rules:
- DNS routing (A, AAAA, MX) and informational TXT (SPF, DKIM, DMARC, MTA-STS) records
- Clean non-residential IP address that has no history of spam hooked up to a public-facing server with open ports:
- 25 for server-to-server mail, which must be public
- 465/587 (submission) and 993 (IMAP) for your mail clients, either publicly or only via VPN (see “Additional Hardening” below)
- 80 for the HTTP-01 certificate challenge, if you use it
- 443 on whatever host serves the MTA-STS policy
- Mailserver setup (MTA, MDA, Spam filter/Policy system)
- Webserver setup (MTA-STS)
- TLS certificates and Certbot to auto-renew them
- Signing secrets for DKIM
Introducing opensmtpd-mailserver
I run multiple different mail server setups, but for my personal mail server, I settled on the tools that I like most:
Dovecot (MDA), OpenSMTPd (MTA), rspamd for spam filtering and policies, and Caddy as a web server. OpenSMTPd might be the most
controversial choice, since most people would probably use Postfix. And I use Postfix in my Mailcow setup, but when I
configure everything manually, I don’t want to bother with those kinds of config files. OpenSMTPd is mature, mostly
feature-complete software from the OpenBSD project, battle-tested for small-to-medium deployments, with sane defaults. Since I use Docker to run all
these services, I built my own Docker image with the unspectacular name opensmtpd-mailserver, which I run for my
personal mail. It uses plain text files over databases, and is just small enough to be easily maintainable.
I admit: For the purpose of this article, this is like cheating, because it frees me from describing all the ins and outs of configuring each component in the stack separately, but if you are interested in how these things are hooked up, feel free to check out the source code in the repo. If you are at a level to care about these nitty-gritty details, you probably are comfortable browsing the code on your own.
Here it is: https://codeberg.org/davd/docker-opensmtpd-mailserver
This is what I run as my mail server. It’s not perfect, but it’s good enough and I like how simple and fast it is. I tried my best to document everything in README.md.
Prerequisites
You need a publicly accessible server (e.g. a Cloud Server) with a provider that allows you to do mail on port 25. Some providers block this outright, others block it by default but will open port 25 for you, if you call their support. The reason is obvious: If port 25 were open by default, spammers would allocate lots of resources at these providers and kill the reputations of their IP blocks. But if you tell them that you want to host a mail server for yourself, your family, your organization or whatever, usually this is possible. I have been with Hetzner for over 15 years now, and after getting port 25 enabled once for my account ages ago, all servers that I created since were directly open.
The IP address that runs your mail server should not have a negative reputation. Cloud servers are optimal for that, because you can create one, check the IP with https://check.spamhaus.org/ and, if it has a bad reputation already, just create a new server and hope for a better IP.
You will also need a domain, ideally one you run mail on for a longer time, maybe with another provider. This gives your overall reputation with services like Spamhaus a head-start. It should be in a “good neighborhood”, so with a domain provider that has a good reputation. Privacy-focused providers like Njalla, unfortunately, are not that. In the best case, it should also be a common, well established TLD, so *.com, *.net, *.org, etc. Trust me, *.io and *.sh are always a bit tricky.
The reputation of your overall setup (if configured well) will be neutral by default. Most of the bigger mail servers you send email to accept that, even if they might greylist you in the beginning or mark your mail as spam. It will improve over time, as people move mail out of the spam folder and your system is around longer.
The better your starting reputation, the smoother the ride.
Server Setup
Since this service needs to be publicly available and residential IPs are not suitable for mailserver deployments, I run
my mail server on the smallest arm64 cloud server at Hetzner. Since I often play around with server setups and don’t
want to lose my IP reputation, I am running the mail server on a Floating IP, separate from the main servers IP that
I use for all the other services running on it. The floating IP is not configured on any interface, instead, I used
docker-compose.separate-ip.yaml from the repo, which has enough inline comments to describe how to configure IPs, but
there is also docker-compose.yaml, which will work just fine with a shared IP for mail and everything else.
I set all the environment variables and started the server.
If you don’t want to mess around with TLS certificates, the image has certbot built in for your convenience. It supports both HTTP-01 and DNS-01 challenge types. I use HTTP-01 since I have a separate IP for mail that doesn’t run a web server normally, so this is simple enough.
Here are the relevant parts of my compose file (the full one, with comments for every option, is in the repo):
services:
  mail:
    # [...] full file: docker-compose.separate-ip.yaml in the repo
    environment:
      MAIL_HOST: mail.example.com
      MAIL_DOMAIN: example.com # comma-separated, the first one is the primary domain
      # Optional, for DNS-01 instead of HTTP-01 (see the comments in the repo file):
      DNS_PROVIDER: ${DNS_PROVIDER:-}
      DNS_CREDENTIALS: ${DNS_CREDENTIALS:-}
    networks:
      mailnet:
        ipv4_address: 203.0.113.25   # dedicated mail IPv4
        ipv6_address: 2001:db8:1::25 # dedicated mail IPv6
    cap_add:
      - NET_ADMIN
      - NET_RAW
    dns: # your own resolver, not a big public one (see below)
      - 192.0.2.53
      - 2001:db8::53
    volumes:
      - /etc/localtime:/etc/localtime:ro
      - ./data/certs/:/etc/letsencrypt/:Z
      - ./data/vmail/:/var/vmail/:Z
      - ./data/config/:/config/:Z
      - ./data/rspamd/:/var/lib/rspamd/:Z
      - ./data/redis/:/var/lib/redis/:Z

networks:
  # ipvlan L3 attaches the container directly to the host NIC, so the dedicated
  # IPs exist only inside the container. Don't configure them on the host.
  mailnet:
    driver: ipvlan
    driver_opts:
      parent: eth0 # host interface, see `ip -br link`
      ipvlan_mode: l3
    enable_ipv6: true
    ipam:
      config:
        - subnet: 203.0.113.25/32  # the mail IPv4 itself
        - subnet: 2001:db8:1::/64  # the IPv6 /64 the mail IPv6 is taken from
ipvlan in L3 mode needs no gateway: the container’s default route is simply the host interface, and the host’s routing
table takes care of the rest. That suits Hetzner’s routed additional IPs well. The :Z suffix on the volumes relabels
the directories for SELinux and does nothing if you don’t use it.
A word on the dns: setting: don’t point the container at a big public resolver like 8.8.8.8 or 1.1.1.1. Blocklist
operators like Spamhaus refuse queries that arrive through them, and instead of an error, you get a “not listed” or a
special error code back, so your spam filter silently loses one of its most important signals. Use your own resolver
(e.g. Unbound on the host or in another container) or your provider’s resolver instead.
DNS Setup
I built the mailserver image so that when you start the container, it will generate all the keys, fetch certificates, etc., and log the resulting DNS configuration proposal, so you can just go ahead and configure that:
docker compose -f docker-compose.separate-ip.yaml logs -f
mail  | Generated new Redis password
mail  | Saving debug log to /var/log/letsencrypt/letsencrypt.log
mail  | Generating DKIM key for example.com...
mail  | writing RSA key
mail  |
mail  | ================================================================================
mail  |  DNS records
mail  |  Names are fully qualified. If your provider wants them relative to the zone,
mail  |  drop the zone from the end (example.com -> @, _dmarc.example.com -> _dmarc).
mail  |  Enter values without quotes, the provider adds them.
mail  | ================================================================================
mail  |
mail  | Mail host mail.example.com (in the zone that contains it)
mail  |   A     mail.example.com                         203.0.113.25
mail  |   AAAA  mail.example.com                         2001:db8:1::25
mail  |   PTR (reverse DNS) of both IPs -> mail.example.com, set at your hosting provider, not in the zone.
mail  |
mail  | Domain example.com
mail  |   MX    example.com                              10 mail.example.com
mail  |   TXT   example.com                              v=spf1 mx -all
mail  |   TXT   mail._domainkey.example.com              v=DKIM1;k=rsa;p=MIIBIjANBgkqhkiG9w0BAQEFAAOCAQ8AMIIBCgKCAQEAnzVDQ/WsLV8WzQaqEjH7JF3R3qHZVph9GDY3zPYsHlEU+sQ0vIeovG+9rRIyCABt8bm9gtL8t1kmhIgFc9yipI5PMa8w5xeBaSNVzBH3vRUu5u7xPyQDqaqk6ho2dY84r2LYK4/NuD2TQ/hwldAjG6hn7Ez63CIFTUzzN43OrplOUS95v9xEN9IVzH+FRd/B0u+Gz858DNM0lAw4KM5t13yVrA9sFJ61zxKJw2ofxGoUDWC53XtjalCAzo4Wr5rfSTcnT5ZHFgqUswk0XCxj/I32AhUgcLrvwzl5FqQ2HxLZ/jLzL0ssYlzlSFEYh7wmcnPFG99osAaGyBR9RBP+uwIDAQAB
mail  |   TXT   _dmarc.example.com                       v=DMARC1;p=none;pct=100;rua=mailto:postmaster@example.com
mail  |   TXT   _smtp._tls.example.com                   v=TLSRPTv1;rua=mailto:postmaster@example.com
mail  |   Optional, MTA-STS (needs a web server, see the README):
mail  |   TXT   _mta-sts.example.com                     v=STSv1;id=20261030
mail  |   A     mta-sts.example.com                      <IP of the web server serving the policy>
mail  |
mail  | Some providers cut TXT values at 255 characters. The DKIM value is longer than that,
mail  | if yours complains, split it into two quoted strings in the middle of the key.
mail  | Next: docker compose exec mail /create-account.sh you@example.com 'password'
MTA-STS
The only thing that’s not fully contained inside the project is the MTA-STS setup. That’s because it needs a URL to serve a static string of text via HTTPS, and since your mail domain usually already runs some web services, there’s no good way to integrate it. In the end, what we need is simple: mta-sts.example.com needs to serve some static text that holds the policy information. In my case, I run Caddy as a web server, so I just added this on my end:
mta-sts.example.com, mta-sts.example.org {
	handle /.well-known/mta-sts.txt {
		header Content-Type "text/plain; charset=utf-8"
		respond `version: STSv1
mode: testing
mx: mail.example.com
max_age: 86400
` 200
	}
	respond 404
}
You should start with mode: testing and watch the TLS-RPT reports (JSON attachments that arrive at the rua address).
When they look clean, switch to mode: enforce with a longer max_age (604800, say) and change the id in the TXT record,
or senders will keep using the cached policy.
DMARC works the same way: the proposed record starts with p=none, which only collects reports. Watch the aggregate
reports arriving at the rua address, and once your legitimate mail passes consistently, move to p=quarantine and
finally to p=reject.
Additional Hardening
Since I am the only one using my mail server, the only port that’s publicly accessible is 25 for server-to-server communication. IMAP and Submission are only open inside a VPN that I configured site-to-site at home, so that my local network can reach my mail server without additional connections (my router terminates the VPN connection). On the go, I run always-on VPN on my phone, so that I can check mail there, too. I do highly recommend that if your setup can afford it because it removes all unnecessary attack surface from the public net.
Testing It
After setting everything up and creating a user, with:
docker compose -f docker-compose.separate-ip.yaml exec mail /create-account.sh you@example.com 'a-strong-password'
…, I wanted to make sure that everything actually works. I set up my mail client, opened the logs and made sure that I can log in to IMAP and send a test message to another one of my accounts. I also verified that I can reply back.
Additionally, it’s always useful to use https://mail-tester.com/ and https://mxtoolbox.com/.
Usual Mail Delivery Problems
Now this is where people get scared off - so if you made it here, please stick around for just a bit longer. It’s not that bad. While I can’t make any guarantees, I never had problems with the receiving side, unless I accidentally broke my system while playing around. And for this server setup especially, the barriers for receiving mail are not unreasonably high, so getting email from others was never the problem.
Delivering mail to others, however, is another scenario, see the Prerequisites section above. The problem is that many providers, like Outlook.com/Microsoft365 to name the worst one in my humble opinion, will block new servers from the get-go and make you jump through a few hoops to get yourself unblocked initially. While that’s annoying, it gets better, and the longer their mail servers know yours (and if the users on your server behave nice and don’t spam others), the better it gets. You might want to find out which providers you send mail to most. Probably the big ones: Outlook.com, Gmail, maybe Yahoo, and probably some regional one. And, for the tech-savvy audience maybe Proton, Tutanota and friends. Most of them offer free tiers, so it’s not a bad idea to have a free account with all of the bigger counterparties you send to. Sending email back and forth (starting with a message from the other party to your server) gives you a feeling for where delivery works and where it fails, and then you can reach out to get unblocked.
My talk at easterhegg23 had a big section dedicated to that topic, I believe the YouTube version has automatic translation, so in case you are interested, feel free to check that out.
Continuous Delivery Monitoring
In case you are hosting mail for more than just a couple of people and mail delivery is business critical for you, you might want to set up scripts that occasionally send mail to your counterparties and report if delivery failed, so that you at least know if mail delivery works, or you analyze your mail logs to detect this with live traffic.
If it’s super, super, super business critical, maybe look into hosted SMTP relays, where you have other people dedicating their time to make sure delivery is working.
Migration
Once everything is working, you’re ready to migrate your data to the new mail server. You probably want to run it alongside your existing solution for a few weeks as a plan B in case things go wrong, but let’s assume everything went well.
Migrating Mailboxes
If there is one tool that makes migrating mailboxes a dead-simple thing, it’s Imapsync.
You call it with the IMAP credentials of your old account and with the IMAP credentials of your new account and it will
sync messages and print a summary, so that you know what’s going on. I usually do a dry-run once, then I do the real
copy, and then I call it again with --delete1, to delete the messages from the old server in case I don’t need them anymore.
It’s also easy enough to run it in Docker, so it’s something like:
docker run -it --rm gilleslamiral/imapsync imapsync \
    --host1 imap.mail.me.com \
    --user1 fancy-icloud-address@icloud.com \
    --password1 'foo123' \
    --ssl1 \
    --timeout1 0 \
    --host2 mail.example.com \
    --user2 new-target@my-own-address.com \
    --password2 'foo123' \
    --tls2
host1 is your migration source and host2 is your new mailserver. Run it from a machine that can reach IMAP on
your new server: if you keep IMAP behind a VPN like I do, that means a machine inside the VPN.
Switching MX
A day before the switch, lower the TTL of your MX record (300 seconds, say), so that the change propagates quickly. Then point the MX record to your new server. Some senders will still deliver to the old one for a while, so keep the old mailbox around for a few days and run imapsync once more afterwards to catch the stragglers. When that run comes up empty, you can raise the TTL again.
Forwarding Old Addresses
Most mail providers support forwarding email to another address. This is what I would set up as a default, and then slowly phase it out. Use the new domain when registering for a service, etc.
Maintenance
I rebuild the image on a semi-regular basis, to make sure I always have the latest version of the software. The repo contains a simple smoke test suite to verify delivery and spam filtering. I build the image in CI, run the tests, and only push the image if the tests succeed. That way, I can make sure I don’t break my mail server, even with auto-update turned on.
Honestly, for my private setup that’s pretty much it. I don’t even monitor deliverability to other hosts… I rarely send super important messages, and if I don’t get a message in time, I take a look at the logs and will see if my message got delivered or not. I could probably be way less lazy about it and have a better experience, but it works fine for 99% of what I do on my personal accounts. For my org and business, obviously, there’s a much bigger framework in place to ensure messages get where they need to.
Backups & Monitoring
I back up the whole data/ directory with restic and resticprofile
in a separate container that’s part of the same compose file. The definition looks like this:
  backup:
    image: creativeprojects/resticprofile:latest
    restart: unless-stopped
    hostname: mail-backup
    entrypoint: '/bin/sh'
    command:
      - '-c'
      - 'resticprofile schedule --all && crond -f'
    volumes:
      - ~/.ssh:/root/.ssh:ro
      - ./profiles.toml:/etc/resticprofile/profiles.toml:ro
      - ./data:/data:ro
    environment:
      TZ: Europe/Berlin
I monitor both the mail server deployment itself (smtp port 25 with certificate expiry alert) and the backup job with Uptime Kuma that runs on a separate host. It notifies me using Ntfy in case it’s down for longer than a few minutes (again, it’s my private setup and I don’t want to get notified for every network blip).
Mail Clients
This category is nothing special: Every device you use probably comes with a mail client out-of-the-box. This is what I use for the most part. If I had configured autodiscovery RFC 6186, most clients would even detect the connection parameters on their own. But since most of my mail server is not publicly reachable and some mail clients have strange mechanisms that don’t evaluate the connection locally, I didn’t even bother.
iOS & macOS
I use Apple Mail. It’s a nice mail client and probably even my favorite, besides all its shortcomings (cough search). It picks up the connection right away and worked flawlessly ever since.
Linux
On Linux, I use Thunderbird. It’s not super pretty, but it made good progress UX-wise recently. It’s still not up to speed but if you didn’t try it for a longer time, it’s probably worth a shot. Honestly, it’s probably still the best open source mail client. It even supports PGP natively, which is nice.
Android
K-9 Mail was swallowed by Thunderbird a few years ago… or the other way around, I am not sure. What used to be K-9 Mail is now just the official Thunderbird app. They started to overhaul the abysmal Android Lollipop era aesthetics, so it looks quite serviceable now (although I would really prefer something with native Material You style). The nice thing: I was able to just scan a QR code from my Linux Thunderbird installation that contained all connection parameters, so I didn’t even need to set it up manually.
Bonus: Catch-All Addresses
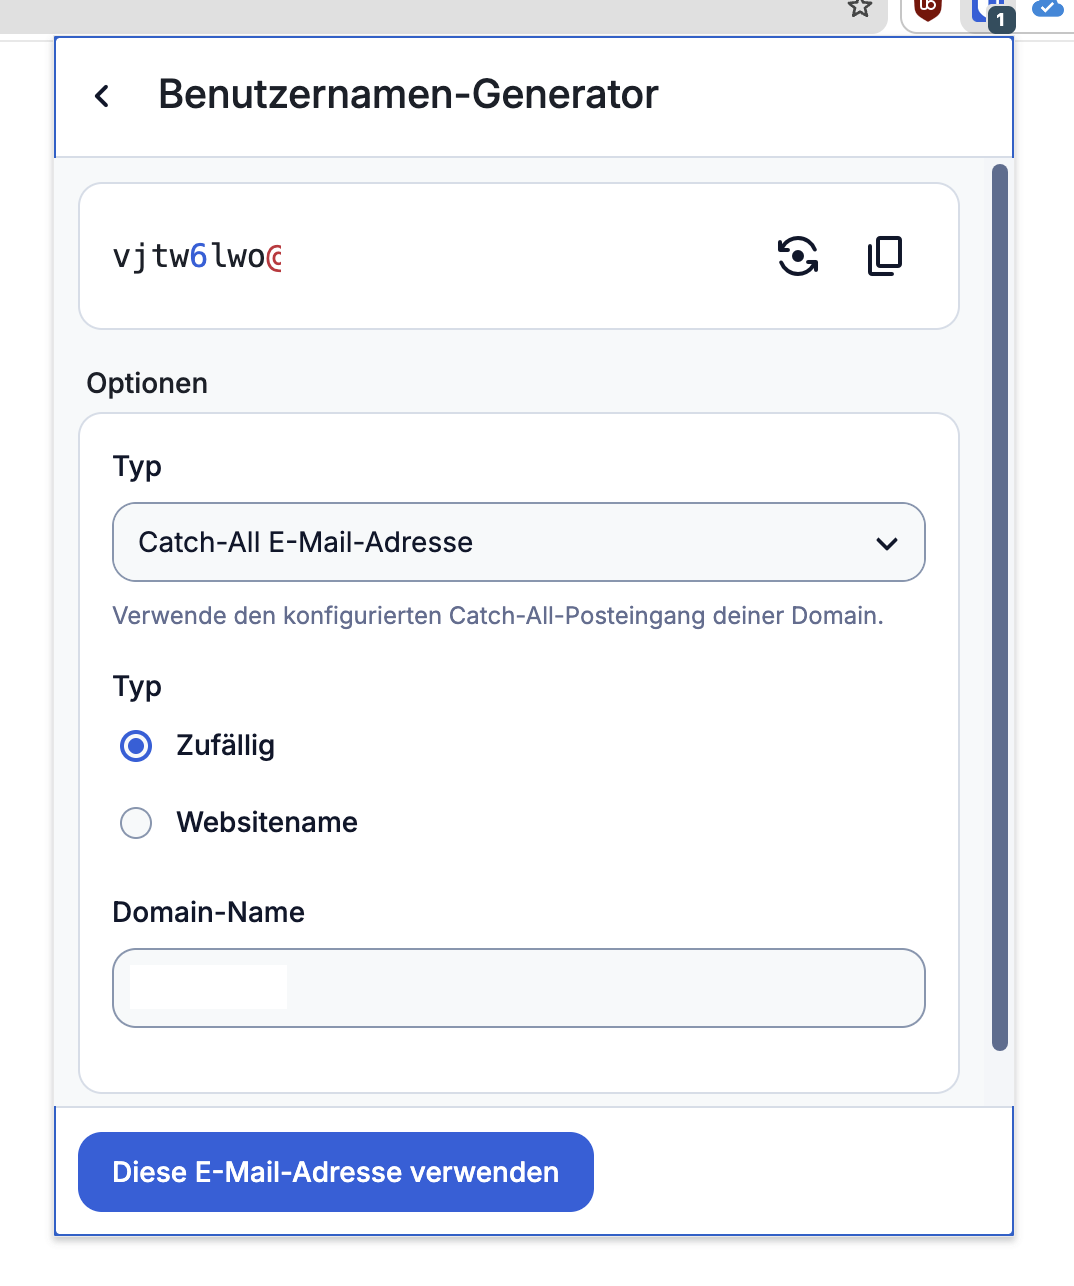
This is not strictly related to running your own mail server, but doing so potentially enables you to have a catch-all email address. With that, every message that goes to any address @yourdomain.tld ends up in your actual inbox. For better hygiene, I would highly encourage you to set this up, and then give every single service you register with its own email address. Not only does this basically eliminate the attack vector of someone guessing your email address to potentially try to get hold of the corresponding password, but it also allows you to see who sells your data: If you get mail to a service-specific mail address that is not actually from that service, you know how they got hold of that address and potentially can do something about it. Bonus: If you use a proper password manager, it can potentially also automatically generate random email addresses based on your domain. This is what I do in Bitwarden:
Bonus: Push Notifications
Push notifications are a notorious problem on modern smartphone platforms: While on Android, you could run an app like
Thunderbird continuously in the background and utilize IMAP IDLE, it basically means keeping a network connection open
all the time, holding a wake lock and hence potentially significantly draining battery. On iOS, you don’t even have
that option since there’s exactly one process that can run persistently in the background to receive notifications,
and that’s pushd, Apples own push notification service, that only receives messages from Apple’s Push Notification
backend, which you can only send messages to when you have a paid developer account. So in practice, both on Android
and on iOS, push notifications are basically limited to providers that provide their own email clients and either use
Apple’s APN or Google’s Firebase.
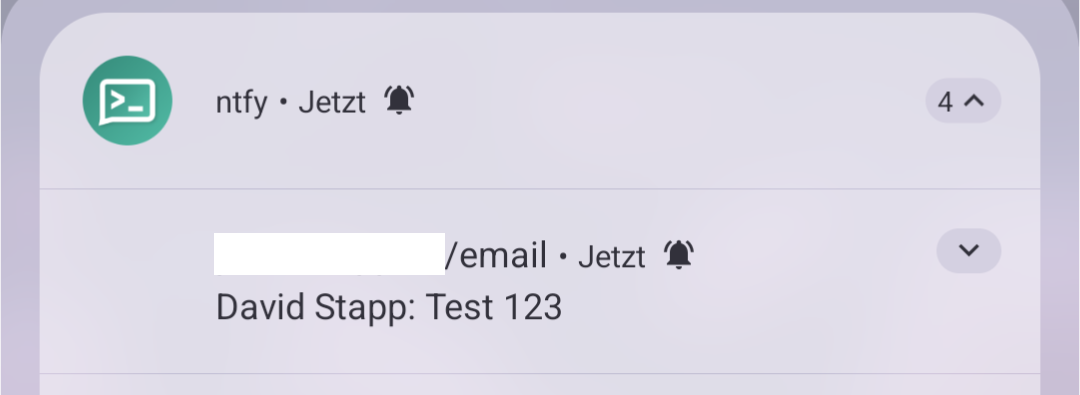
That’s unless you get creative: I use ntfy for everything push. It’s a self-hosted server and a companion mobile app.
On my Android phone, it’s the only service that runs in the background and receives notifications. On iOS, the ntfy
app works with a self-hosted server too: set upstream-base-url: "https://ntfy.sh" in your server config, and it
forwards a wake-up ping (without the message content) via ntfy.sh to Apple’s push service. Simply call a URL
with a specific payload and every device that’s in that ntfy channel will get a push notification. This is also what
I use for email: Sieve (mentioned earlier) can be configured to execute a script, every time a new email is delivered
to your inbox.
In data/config/sieve-bin/, I created a file called ntfy.py:
#!/usr/bin/env python3

import sys
import urllib.request
from urllib.parse import quote
from email import policy
from email.parser import BytesParser
from email.utils import parseaddr

NTFY_URL = "https://push.example.org/email"
NTFY_TOKEN = "12345"

message = BytesParser(policy=policy.default).parse(sys.stdin.buffer)

subject = str(message.get("Subject", ""))

from_header = str(message.get("From", ""))
from_name, from_address = parseaddr(from_header)
sender = from_name or from_address

notification = f"{sender}: {subject}"

headers = {
    "Authorization": f"Bearer {NTFY_TOKEN}",
    "Content-Type": "text/plain; charset=utf-8",
}

# Message-ID: "<abc123@mail.example.com>"
message_id = str(message.get("Message-ID", "")).strip().strip("<>")

if message_id:
    encoded_id = quote(message_id, safe="@")

    # Thunderbird: mid:<id> (RFC 2392)
    headers["Click"] = f"mid:{encoded_id}"

    # Apple Mail.app (alternative): swap in this line and remove the one above
    # headers["Click"] = f"message://%3C{encoded_id}%3E"

request = urllib.request.Request(
    NTFY_URL,
    data=notification.encode("utf-8"),
    headers=headers,
    method="POST",
)

try:
    with urllib.request.urlopen(request, timeout=10) as response:
        response.read()
except Exception as exc:
    print(f"Failed to send ntfy notification: {exc}", file=sys.stderr)
    sys.exit(1)
That calls my ntfy endpoint with a notification containing both the sender and subject of the message I received. Make sure
to make it user-executable. A note on the Click link: mid: links work with desktop Thunderbird, but on mobile it
depends on whether your mail client handles them. If it doesn’t, tapping the notification just opens the ntfy app.
The script is then called by Sieve in data/vmail/example.com/user/.dovecot.sieve:
require ["vnd.dovecot.execute"];

# Don't notify for mail rspamd flagged as spam
if not header :is "X-Spam" "Yes" {
    execute :pipe "ntfy.py";
}
There’s one catch if ntfy runs on the same host behind a reverse proxy: with ipvlan, the mail container can’t reach the
host’s own IPs, so the request to https://push.example.org times out. The fix is a shared Docker network that both
the mail container and the reverse proxy join, with the proxy carrying ntfy’s hostname as an alias there. Docker’s DNS
then resolves that hostname to the proxy for containers on the network, and HTTPS keeps working with the proxy’s
certificate:
services:
  mail:
    networks:
      mailnet: # [...] as above
      shared: {}

  # in the reverse proxy's compose file:
  proxy:
    networks:
      default: {} # keep the proxy's existing networks
      shared:
        aliases:
          - push.example.org

networks:
  shared:
    external: true
Create the network once with docker network create --internal shared, so neither compose project owns it. It has to
be internal: Docker never routes the default route through an internal network, so outgoing mail keeps leaving via the
dedicated IPs. With a regular network, it might use the host’s IP instead, breaking SPF and rDNS. After restarting,
docker exec mail ip route should still show the default route via the ipvlan interface, and
docker exec mail getent hosts push.example.org should return the proxy’s address on the shared network.
Support for Sieve exec rules and Python scripts is already baked into the image, see https://codeberg.org/davd/docker-opensmtpd-mailserver/src/branch/main/rootfs/etc/dovecot/conf.d/90-plugin.conf for details.