FreeBSD is the ideal system to use when building a server. It’s reliable and rock-solid and it’s file system ZFS not only offers anything you would expect from a file system but is also easy to set up and to maintain. This is why I chose it to power my NAS. In Part 1 and Part 2 of this series I already described my intentions and the hardware assembly. Now it’s time to bring it to life.
1. Preparation
I decided to use the netinstall image of FreeBSD 10.3 amd64 on a memstick. From OS X I unmounted the memory stick and wrote the image file to the disk (please be sure to change the device to the one matching your memory stick):
sudo diskutil unmountDisk /dev/disk2
sudo dd if=freebsd-memstick.iso of=/dev/rdisk2 bs=8m
sudo sync
sudo diskutil eject /dev/disk2
I also chose to disconnect all hard disks except for the system disk to eliminate the risk of accidentally installing it onto the wrong device.
2. Trusted boot / UEFI setup
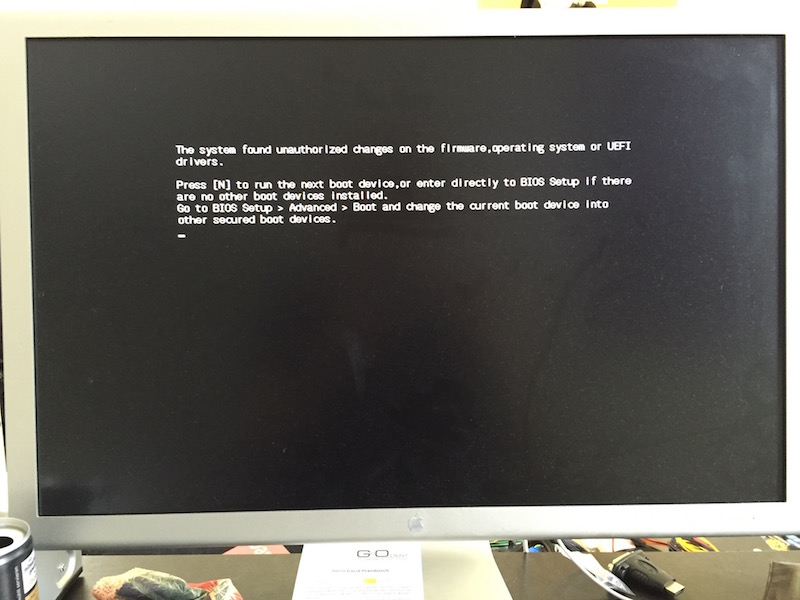
When I first attached the memstick and booted the system, I got the following error:

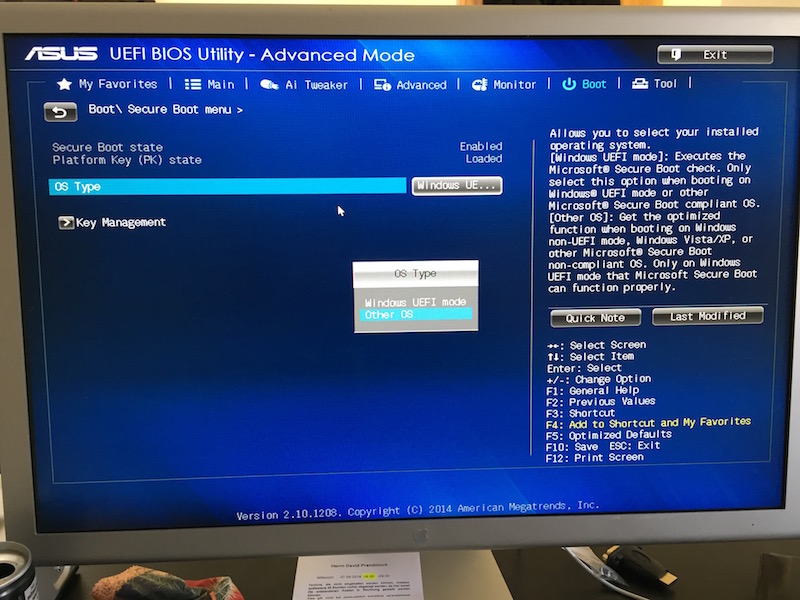
The motherboard I bought uses trusted boot to ensure that I don’t use a bootloader that is corrupted by checking it’s code signature. But as the FreeBSD bootloader is not listed, this won’t work. So I first had to disable the “secure boot” option in the UEFI BIOS by changing “Windows UEFI mode” to “Other OS”.

Additionally, in the advanced setup menu I enabled the “PCIe power” setting to enable Wake-on-LAN for the internal network adapter to allow the system to be booted remotely, which is essential if you don’t have a IPMI module :-)
3. OS installation
The FreeBSD installation itself is straight forward. All components are supported and there’s no need to load additional drivers or to do any sysadmin voodoo to get it working. In the bootloader menu I chose “UEFI boot”, as this is supported since 10.3 so I thought it’s time to give it a try.
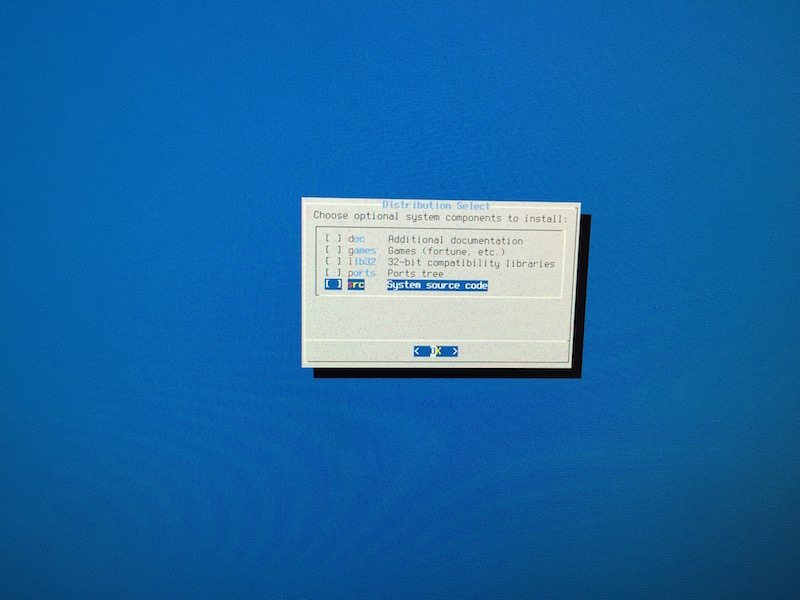
To keep the system footprint as minimal as possible, I did not install any additional components like docs or kernel sources. And because I use prebuilt binary packages rather than the ports collection (at least on the host), I didn’t install the ports snapshot either.

3.1. Root-on-ZFS
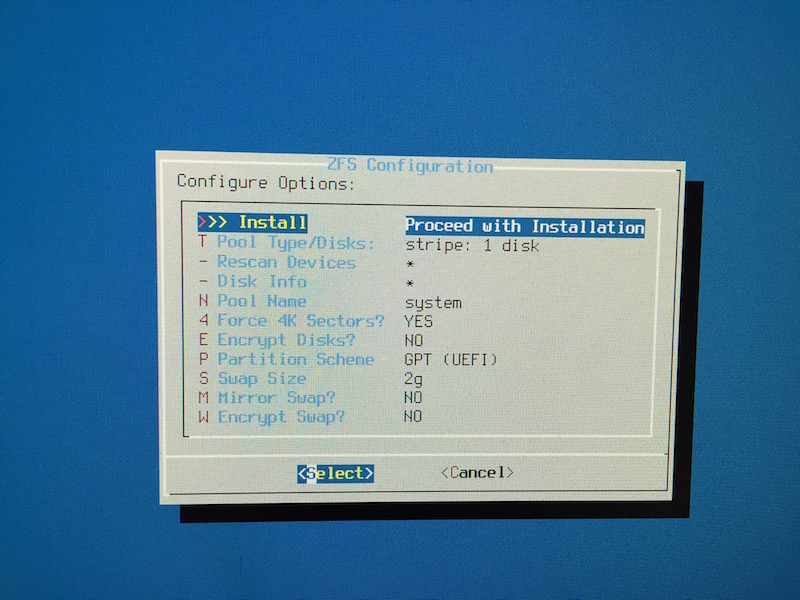
I gave the system static IPv4 and IPv6 addresses and chose “Guided Root-on-ZFS” for the disk setup. As there’s currently only one system disk without redundancy I used ZFS striping (later on we’ll attach a mirror disk and convert the single-disk pool to a mirror) and called the pool “system” which is essential as I want to create another pool for data storage later on. At this point I chose to not use encryption for system disk as I can do this on a per-jail basis later on.

When it came to the system startup configuration I enabled sshd, powerd and ntpd. Then reboot and - viola: working system!
3.2. Post installation
After I successfully logged in via SSH, I installed pkg, zsh, vim-lite (which is vim-console in newer versions)
and my dotfiles.
For better security I also disabled ChallengeResponseAuthentification (aka password auth) and set up my public key to
be allowed to connect. I also enabled ntpdate for automatic time synchronization:
sysrc ntpdate_enable=YES3.3. Wake-on-LAN
As I want to use WOL to boot my system, I already prepared for the struggle I know from setting this up on linux. But
in FreeBSD you don’t need to do anything as long as WOL is support/enabled in your BIOS and your network device supports
responding to Magic Packets which is indicated by WOL_MAGIC in the options line on ifconfig:
ifconfig re0
re0: flags=8843<UP,BROADCAST,RUNNING,SIMPLEX,MULTICAST> metric 0 mtu 1500
  options=8209b<RXCSUM,TXCSUM,VLAN_MTU,VLAN_HWTAGGING,VLAN_HWCSUM,WOL_MAGIC,LINKSTATE>
  ether xx:xx:xx:xx:xx:xx
  inet 10.0.0.20 netmask 0xffffff00 broadcast 10.0.0.255
  [...]
  nd6 options=23<PERFORMNUD,ACCEPT_RTADV,AUTO_LINKLOCAL>
  media: Ethernet autoselect (1000baseT <full-duplex>)
  status: active
Now I can just run the following command from my local machine (brew install wakonlan required) where xx:xx:xx:xx:xx:xx
is the MAC address of the NAS and 10.0.0.255 matches the broadcast address of the network that both machines reside in:
sudo wakeonlan -i 10.0.0.255 xx:xx:xx:xx:xx:xx3.4. Automatic shutdown
Additional to WOL for boot, I want the system to shut down automatically at night to save energy. So I set up a cronjob for the root user, that powers off the system at 3:01 AM:
SHELL=/bin/sh
PATH=/bin:/sbin:/usr/bin:/usr/sbin:/usr/local/bin
HOME=/root

1 3 * * * /sbin/shutdown -p now
3.5. System-wide UTF-8
Only seing half the name of some files is tedious, therefore I set UTF-8 as a system-wide locale. To do this,
I added the following charset and lang properties to my /etc/login.conf:
default:\
    [...]
    :charset=UTF-8:\
    :lang=de_DE.UTF-8:\
    :umask=022:
Afterwards, to rebuild the hash database:
cap_mkdb /etc/login.conf4. Periodic status mails
FreeBSD sends daily, weekly and monthly status reports of the system including information about vulnerable packages
and storage pool health. As I don’t want to run a mail server on the NAS I installed ssmtp and configured it to
use a SMTP account on my mailserver to deliver the status mails. I already described how to do this a few weeks ago
in the post FreeBSD: Send mails over an external SMTP server.
Afterwards I created the file /etc/periodic.conf by copying the example file:
cp /etc/defaults/periodic.conf /etc/periodic.confand enabled the option daily_status_zfs_enable to get daily status on ZFS. Also, by default daily mails are send
at 3:01 AM but at this time my NAS won’t be running. So I decided to change it to 10:00 PM by editing /etc/crontab and
change the line containing periodic daily to something like that:
1 22 * * * root periodic daily
Running periodic daily manually ensured that was working properly.
5. S.M.A.R.T. setup
To keep track of disk health I decided to install smartmontools which can also be integrated with periodic(8).
So after running
pkg install smartmontools
sysrc smartd_enable=YES
I added the line
daily_status_smart_devices="/dev/ada0 /dev/ada1 /dev/ada2"
to /etc/periodic.conf to include it in the status mails.
Running periodic daily again resulted in the following text:
SMART status:
Checking health of /dev/ada0: OK
Checking health of /dev/ada1: OK
Checking health of /dev/ada2: OK
6. Storage pool setup
Now that the base system setup was completed, I set out to create another ZFS pool for data storage. This would incorporate the WD Red drive (I only got one for the beginning, but I will buy another one to set up a mirror) and the Corsair SSD for L2ARC cache.
L2ARC cache explanation from http://www.brendangregg.com/blog/2008-07-22/zfs-l2arc.html :
The “ARC” is the ZFS main memory cache (in DRAM), which can be accessed with sub microsecond latency. An ARC read miss would normally read from disk, at millisecond latency (especially random reads). The L2ARC sits in-between, extending the main memory cache using fast storage devices - such as flash memory based SSDs (solid state disks).
First I had to find out which disk is attached to which port and which port refers to which disk label.
camcontrol devlistlists all disks with their name and device name (adaX), and
glabel statusshows all attached labels:
<Corsair Force LS SSD S9FM02.6>    at scbus0 target 0 lun 0 (ada0,pass0)
<WDC WD30EFRX-68EUZN0 82.00A82>    at scbus1 target 0 lun 0 (ada1,pass1)
<WDC WD5000BPVT-00HXZT3 01.01A01>  at scbus2 target 0 lun 0 (ada2,pass2)
                            Name  Status  Components
diskid/DISK-16088024000104781294     N/A  ada0
     diskid/DISK-WD-WXH1E93PJW64     N/A  ada2
           diskid/DISK-73APPCH8T     N/A  ada3
In my case ada1 had no disk label listed so I just used the device name - if you do that, it’s better to pick the label
in case you change your SATA wiring:
zpool create data /dev/ada1Then I added the SSD cache drive, in my case diskid/DISK-16088024000104781294 (ada0):
zpool add data cache /dev/diskid/DISK-16088024000104781294zpool status indicated, that everything worked correctly:
  pool: data
 state: ONLINE
  scan: none requested
config:

    NAME                                STATE     READ WRITE CKSUM
    data                                ONLINE       0     0     0
      ada1                              ONLINE       0     0     0
    cache
      diskid/DISK-16088024000104781294  ONLINE       0     0     0

errors: No known data errors
7. Jails
I decided to jail all my services separately to ensure upgradability and a clean system setup. In my post
FreeBSD jails with a single public IP address I already
described how to set up FreeBSD jails with ezjail.
In this case I chose to use a pseudo-bridge (host having a separate “public” LAN-visible IPv4 address for each jail).
So I didn’t have to set up pf at all, I just added this lines to /etc/rc.conf (where re0 is the network adapter):
ifconfig_re0_alias0="inet 10.0.0.21 netmask 255.255.255.0"
ifconfig_re0_alias1="inet 10.0.0.22 netmask 255.255.255.0"
ifconfig_re0_alias2="inet 10.0.0.23 netmask 255.255.255.0"
ifconfig_re0_alias3="inet 10.0.0.24 netmask 255.255.255.0"
ifconfig_re0_alias4="inet 10.0.0.25 netmask 255.255.255.0"
and restarted the network using service netif restart. ezjail installation worked as described in my blog post
mentioned above. Right after installing ezjail and before running ezjail-admin install, I edited the ezjail’s main
configuration file /usr/local/etc/ezjail.conf to enable ZFS usage. As I wanted to have all jails on the data-pool, I
added the following:
ezjail_use_zfs="YES"
ezjail_use_zfs_for_jails="YES"
ezjail_jail_zfs="data/ezjail"
When running ezjail-admin install I got an error saying “Network is unreachable” but after restarting everything
worked smoothly. Running zfs list shows that ezjail created ZFS datasets for all resources:
NAME                         USED  AVAIL  REFER  MOUNTPOINT
data                         536G  2.11T    96K  /data
data/ezjail                  536G  2.11T   124K  /usr/jails
data/ezjail/basejail         435M  2.11T   435M  /usr/jails/basejail
data/ezjail/newjail         6.00M  2.11T  6.00M  /usr/jails/newjail
[...]
To get the name resolution working from within the jails, I also copied over my resolv config to the template for new jails:
cp /etc/resolv.conf /usr/jails/newjail/etc/