In this article I will describe how I set up my Nextcloud instance aiming to replace iCloud Drive. This article is part of the byeCloud series in which I try to replace iCloud with self-hosted services.
The goals for a file syncing infrastructure are simple
- I want a reliable solution that syncs files as-is,
- that does not corrupt them
- and does not cancel uploads all the time.
- Additionally, I want to be able to access my files on the go using a mobile app, as well as having files on my local hard disk to also be able to use it offline, just in case I have no network connection.
- Files should be stored again as raw files on the file system so that I can back them up easily.
As it turns out, Nextcloud offers a solid file syncing mechanism. There are many people that say it is somehow unreliable and slow. I cannot reproduce that properties, for me it works great - maybe because I’m not syncing files of the size of modern hard drives. For me, it’s more about documents, images, some videos shot on my phone and so on.
System setup
My Nextcloud installation uses Redis for caching and file locking making the web interface fast and responsive.
Nextcloud uses WebDAV, a well-known standard for file management over HTTP as the way of choice for file exchange. Therefore there are many client options as well as native support in almost any relevant operating system.
As described in the first article of the series, I use a Linux VM on my home NAS. All services are provided using Docker containers. I will use docker-compose to define the services of my application. In the end what I want to have is one single project that includes all services for my personal cloud.
The Nextcloud Docker image
The Nextcloud project provides an official docker image (GitHub, DockerHub). Beside the Nextcloud sources, this also provides PHP and Apache. Sadly there’s no nginx image for this. But there’s wonderfall/nextcloud which is my favorite image for Nextcloud & nginx.
Project setup
I also set up a reverse proxy service in my docker-compose.yml file that will act as a global reverse proxy for all the services I use. For this purpose I use my favorite web server Caddy. Sadly there’s no official Docker image for this yet, so I use abiosoft/caddy. By the way, Caddy offers full Let’s Encrypt support so if you plan to run your Nextcloud instance on a publicly accessible server, it’s only one line in the config to get a valid SSL certificate and auto-renewal.
Here’s a example docker-compose.yml file for running Nextcloud with MariaDB:
version: '3'

services:
  entry:
    image: abiosoft/caddy:no-stats
    restart: unless-stopped
    privileged: true
    links:
      - nextcloud
    ports:
      - "80:80"
    volumes:
      - ./Caddyfile:/etc/Caddyfile

  db:
    image: mariadb:10
    restart: unless-stopped
    environment:
      - MYSQL_ROOT_PASSWORD=myrootpw
      - MYSQL_DATABASE=nextcloud
      - MYSQL_USER=nextcloud
      - MYSQL_PASSWORD=mynextcloudpw
    volumes:
      - nc-db:/var/lib/mysql

  nextcloud:
    image: wonderfall/nextcloud:15
    restart: unless-stopped
    links:
      - db
    environment:
      UID: 1000
      GID: 1000
      UPLOAD_MAX_SIZE: 10G
      APC_SHM_SIZE: 128M
      OPCACHE_MEM_SIZE: 128
      CRON_PERIOD: 15m
      TZ: Europe/Berlin
      ADMIN_USER: admin
      ADMIN_PASSWORD: admin
      DOMAIN: domain.tld
      DB_TYPE: mysql
      DB_NAME: nextcloud
      DB_USER: nextcloud
      DB_PASSWORD: mynextcloudpw
      DB_HOST: db
    volumes:
      - nc-apps:/apps2
      - ./nextcloud-config/:/config
      - nc-data:/data
      - nc-themes:/nextcloud/themes

volumes:
  nc-data:
  nc-apps:
  nc-themes:
  nc-db:
Using Caddy as a reverse proxy is super simple, this is my Caddyfile as referred in the docker-compose.yml:
http://domain.tld {
    proxy / nextcloud:8888 {
    	transparent
    }
}
Running docker-compose up -d should already give you a running nextcloud instance on the specified host (as long as you have a correct hosts entry/DNS record).
Client side: macOS (also Windows, Linux)
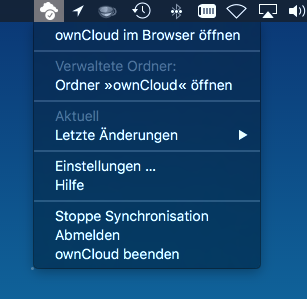
On my macs, I use the official ownCloud client for file syncing. It always runs in the background and has a icon in the menu bar that allows for direct file access, force syncing (a feature that I always missed in iCloud Drive) and many other options. Like on iCloud Drive, there is a directory created in your home directory. All the stuff you put in there will be synced. Easy as that.
There is also an official Nextcloud client that is a fork of the ownCloud client but as it seems to have issues with some TLS certificates, it’s not usable for me right now. As soon as it works, I will switch over to it.
Client side: iOS
In the beginning I thought there was no official Nextcloud app and therefore I was using the ownCloud app which really is not a masterpiece of software. It had almost only one feature, which is file sync and even that worked not very reliable.
Some weeks ago I recognized that there is a Nextcloud app by “TWS” but I thought that this is some app of a third-party vendor and decided to not even try it.
But as it turns out, TWS is working (as a contributor?) for the Nextcloud project and this is their official app. So I decided to give it a shot and downloaded it from the App Store for 99 cents. As it turns out, this app is so much better than the ownCloud app. It works reliable on file syncing and provides some more interesting features I will talk about later.
They even made it open source which is great. But hey, support them! The $0.99 is really worth it.
Pitfalls
I recently had the problem that the desktop client always got timeouts when trying to connect to my Nextcloud instance. After longer research I found out that Nextcloud has a brute force prevention mechanism that kicks in after too many failed login attempts from one IP address. The problem is that the Nextcloud container only see is the IP of the reverse proxy rather than the real IP address of the client. Therefore it added a timeout of 10 to 30 seconds per request. In my opinion this more risky than helpful because no one really knows about it and no client can come up with useful error messages as the behavior is like normal but slower.
To get rid of this I first truncated the database table oc_bruteforce_attempts and then added the following to my Nextcloud configuration file:
'auth.bruteforce.protection.enabled' => false
Please be aware that I only added this because I’m running my Nextcloud instance on my local network only. If you are running on the publicly accessible server you should take possible security risks into consideration.